So I was searching around and didn’t find many pages talking about revision control of Eagle PCB files so I struck out on my own. I have a license for Eagle 5.X so this post covers binary files (Guess where the previous post came from), not Eagle 6 with the new XML based files.
Version control of almost any file becomes a necessity when you work on multiple computers and recently I have needed to use my laptop in addition to my desktop for PCB development. I have a number of existing Eagle projects and a custom library with parts that aren’t included in the normal Eagle libraries on my main desktop. The projects I have contain a schematic file and a board file in a folder under the eagle home directory and the library is also under the same default eagle folder . I’m not a fan of the default directory since all my project stuff is in multiple SVN folders and directories so this post covers SVN management with different folders from the default eagle directory.
The first thing I did is make sure my library would be shared on both my laptop and desktop, first I copied the library to a new folder under an existing SVN checkout. Add and commit the new folder and library as you would any other file. Next select “Options>Directories” menu from Eagle, click at the end of the Libraries entry box and browse and select the file or (if you know where it is relative to your home directory) add $HOME/path/to/library. After clicking OK you should see the library folder under the “Libraries” main list. On the laptop I updated the SVN folder and added the path to the library in that install of Eagle in the same way. For each Eagle install, make sure you click the dot next to the library name in the main list so Eagle knows you want to use this library for your projects.
Next I copied the schematic and board files for a project to a new SVN folder (it doesn’t have to be the same folder as the library) and did an Add and Commit to the files. Going back to the “Options>Directories” I added a new entry to the “Projects” list the same way as for the library. After clicking OK I had the new directory under the Projects list in the main menu. Again, update the SVN on other computers and point any Eagle install to that local checkout. Opening the schematic and board on my laptop, Eagle knew I wanted to use my custom library and all symbols, packages and devices were exactly as they were on the original computer. Just for a test I moved the old library folder and projects on the original desktop to another directory and the schematic and board for the new SVN project loaded up just fine.
I generate Gerber manufacturing files for Eagle using the gerb274x.cam and excellon.cam CAM files provided by Eagle.  The output files are by default added to the root of the project directory, after generation I move them to a rev_X (rev_A, rev_B, etc) folder in the root of the project.  Use SVN Add and Commit the folder and files to have a history of when different releases were created.
The binary files generated by Eagle can be a little difficult to manage in SVN. Â My suggestion is to understand a revision control system such as SVN in depth and follow a set of rules to minimize editing the wrong file (Binary files and revision control article).
I have written a new article on controlling binary files in a revision control system such as SVN.  The article started out as a post, but after taking up the whole page I thought I would made a dedicated page for it.
Now from my experience, talking about revision control is like talking about politics or religion, everyone has their own opinion and everyone else is wrong. Â Time for some flames!
So I’ve been working on how to power nixie tubes in the simplest way, getting 170v isn’t as easy as connecting a wall-wart and using an LDO.  There are lots of boost circuits to go from 5v or 12v up to ~170v, but there are tons of options, can be a little on the expensive and some include a bunch of extra components which I don’t really want to deal with.  I decided to investigate powering the tubes from the rectified 120vac mains.
US mains AC is 120v RMS, which means using a full-bridge rectifier would result in a peak voltage of 170vdc [RMS and and full bridge rectifier].  Adding a capacitor to the output would hold the voltage at the peak of 170vdc.  As power is used from the capacitor it is replenished to 170v at a rate of 120Hz, resulting a 120Hz ripple voltage.  The tubes only use 2.5 mA each, so with a total of  15mA of draw I figured a little DF04 bridge rectifier and a 200v 10uF cap should work just fine.  I made up a little test board last night and hooked up a scope today.
Looks like with a 20mA draw there is about 14v of ripple, the min voltage is 158v (above the cut off for the tubes) and the drain time once power is pulled is ~300ms, which means the cap won’t be charged to 170v for too long.
Now I just need to figure out a way to get down to 5v from the mains without a gigantic transformer
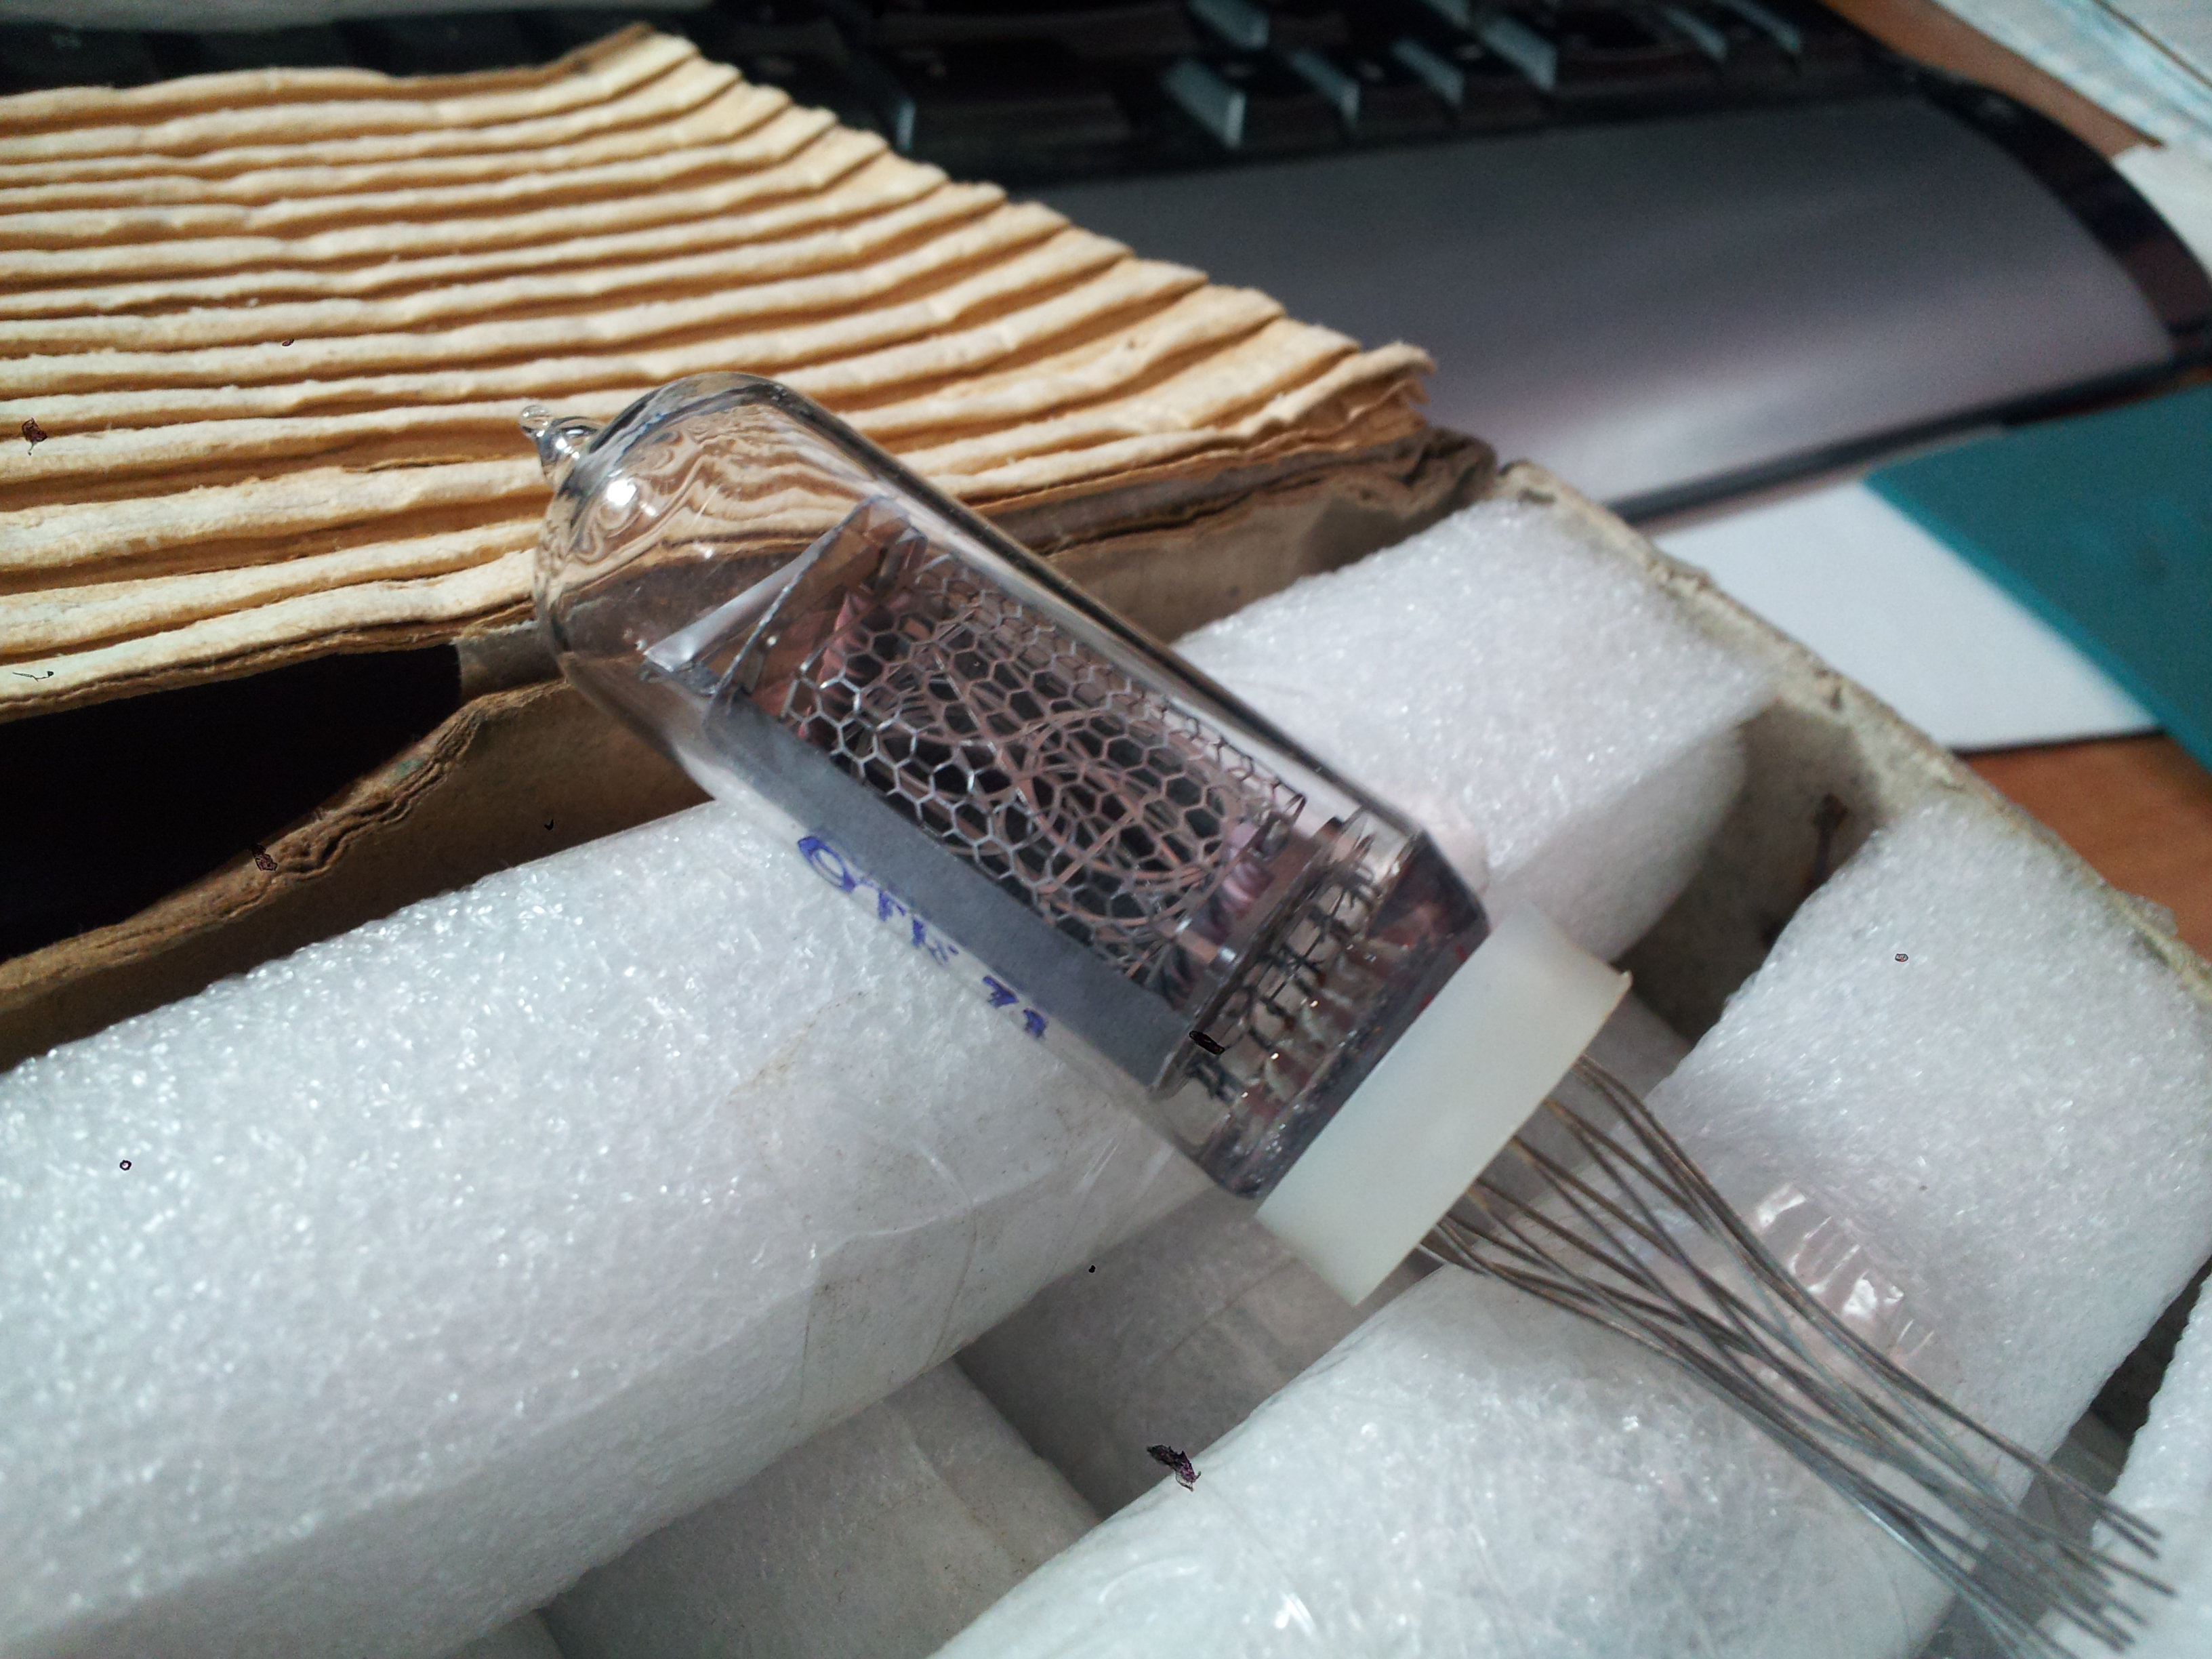
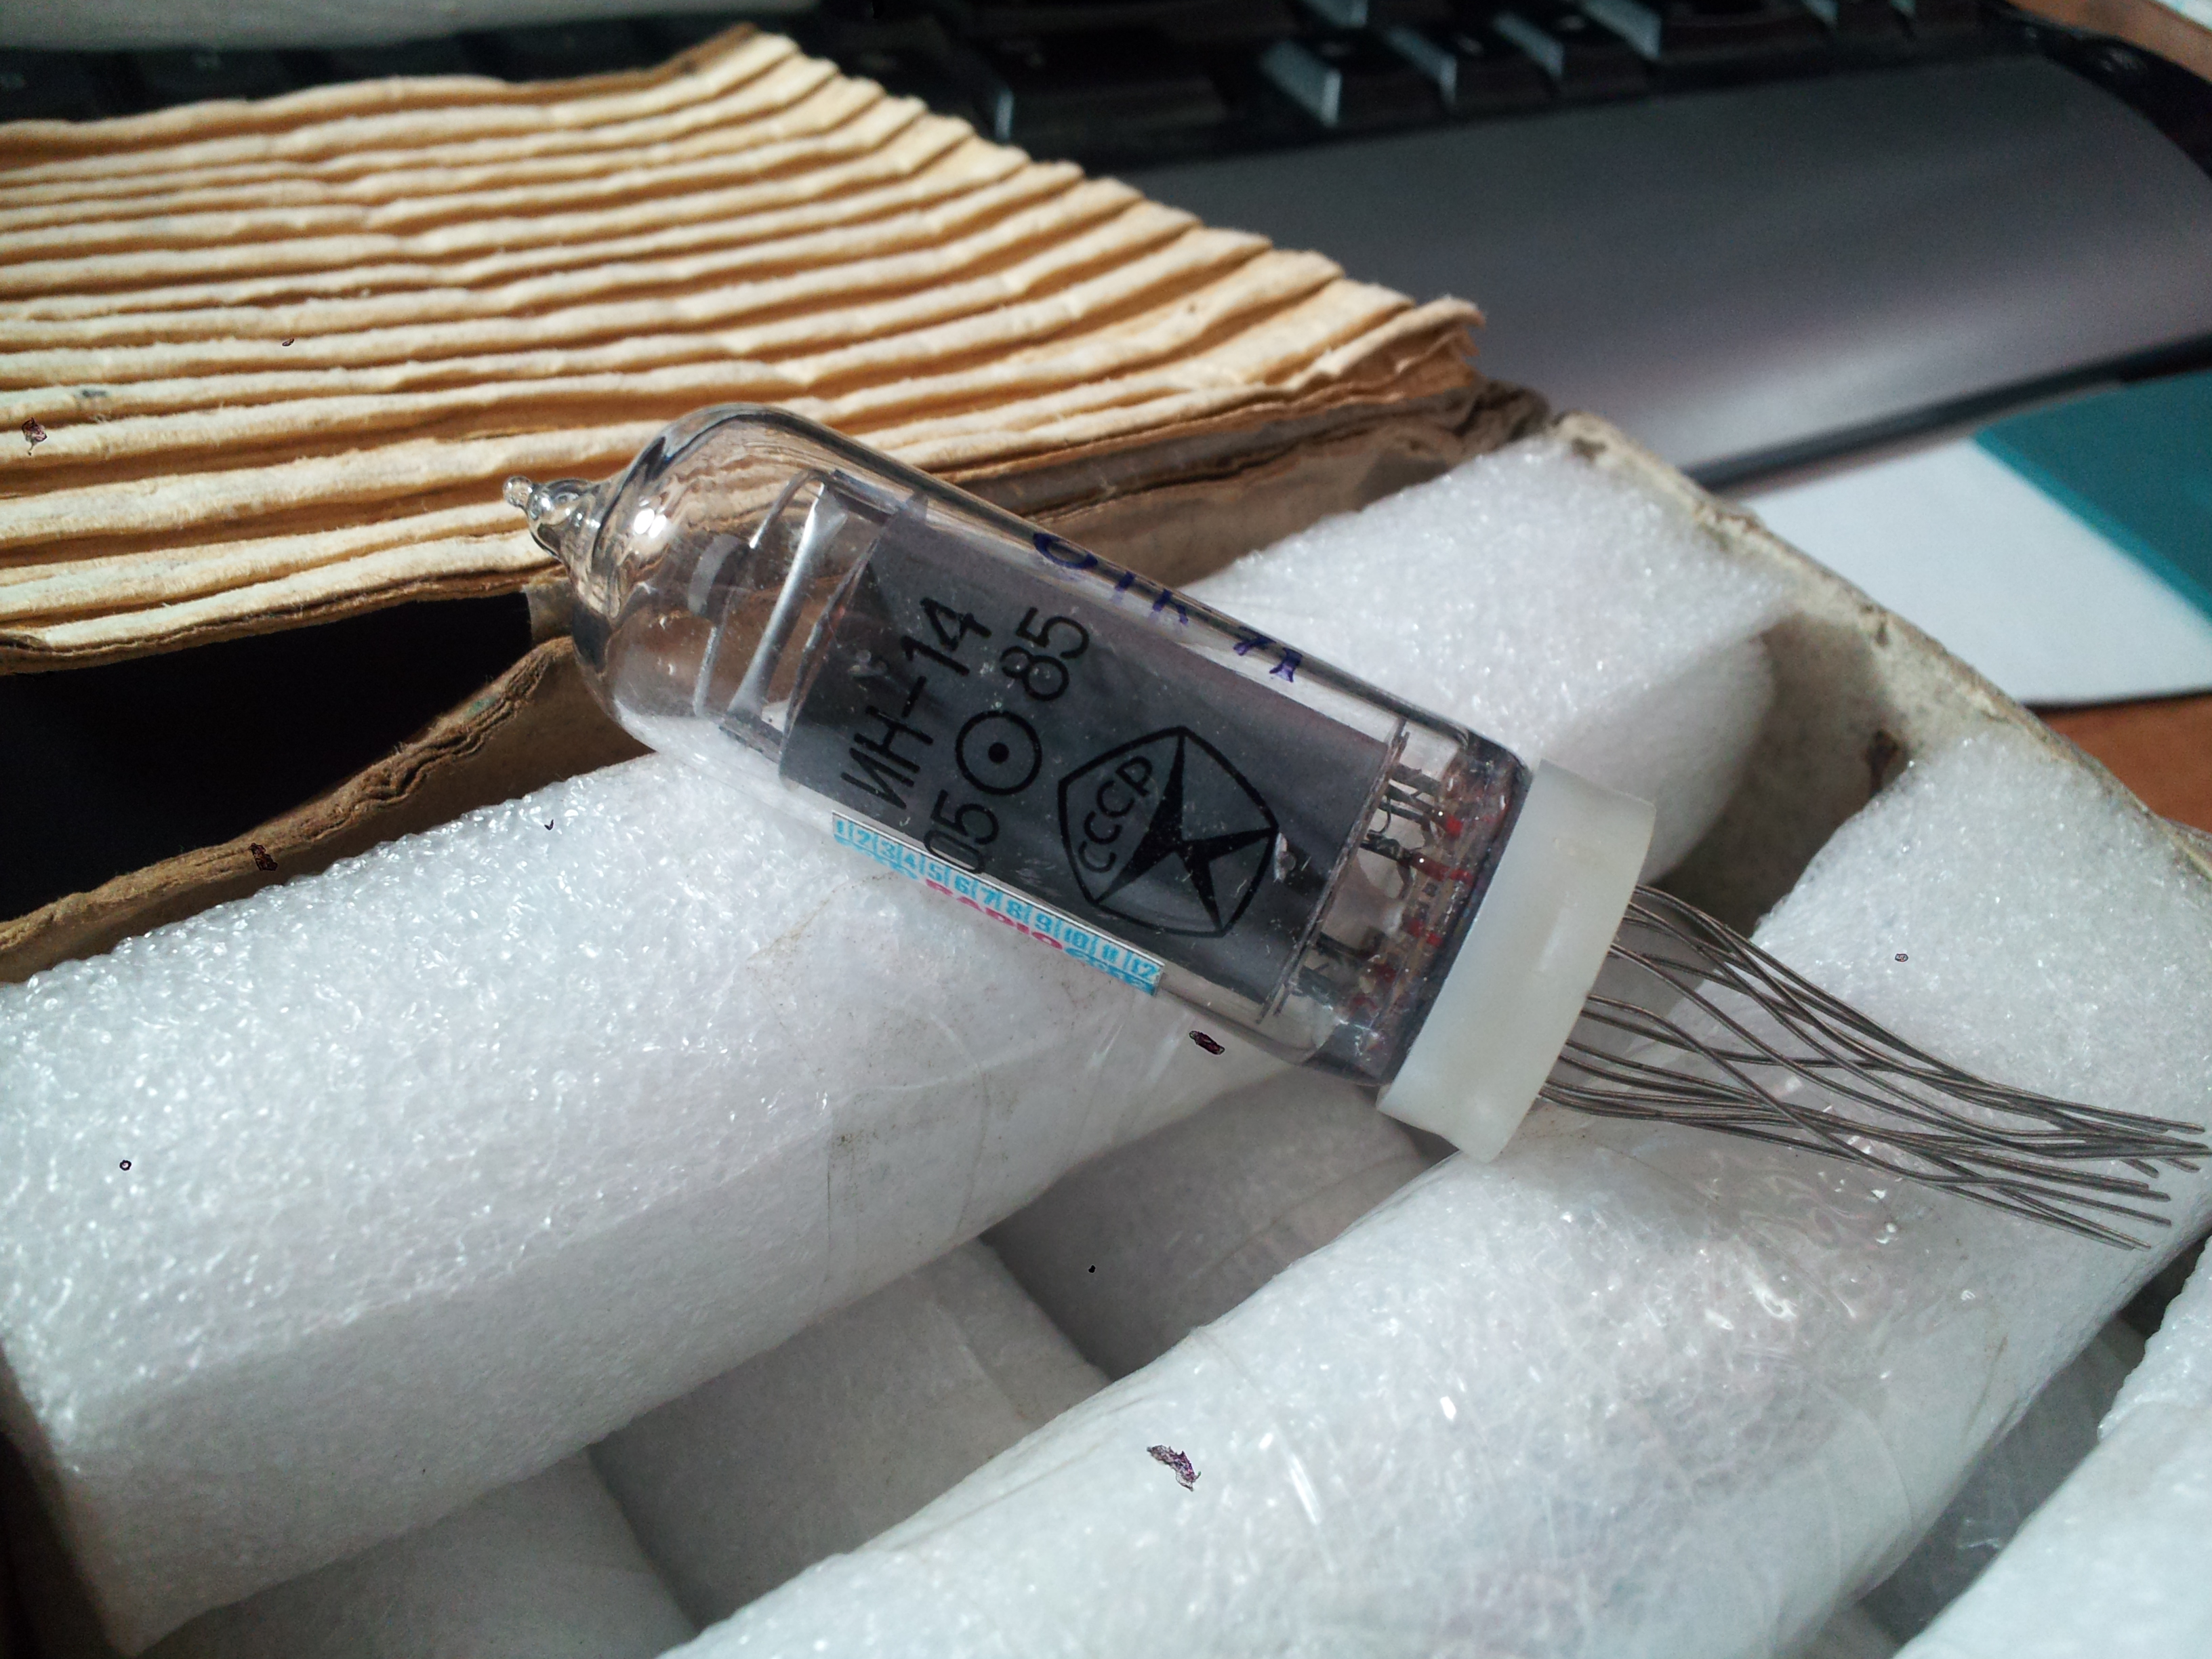
So I committed 100% to the Nixie Clock.  On September 29th I bought a lot of 6 IN-14 nixie tubes [datasheet pdf] off ebay from radiokomponent for about $9.50 each including shipping from the Ukraine.  I was a little worried about the shipping taking forever but they arrived in Colorado today, so not too bad. I also bought an IN-12B nixie [info] for about $6 to test with.
A word of warning on purchasing off ebay, the tube I purchased was an IN-12B, however the shipper sent an IN-12A.  The A part is without a comma, so be careful if you are expecting an exact part.
The tubes look in good shape, and look never used.  The IN-14s are about 2.25 inches tall including the plastic base, marked as “ИH-14” and have an awesome retro CCCP logo on the back, very cold war.
Tonight I made up a footprint in Eagle to mount the IN-12A and am routing it out on a little test PCB on my router (I know I need to post about that). Â The IN-12A footprint isn’t too hard to make in eagle, everything is pretty much on the 0.5mm mark. Â After two tries the PCB came out pretty good and mounts the IN-12B snug with 1.2mm (~48mil) holes.
Super busy lately with work and taking an embedded design course for my masters. Â In the embedded course we have to build a custom project by the end of the semester, I think I am going to build a Nixie clock that has a countdown and count up timer.
This video isn’t mine but it’s an idea on what I want to do.
How would you like to get 10 PCBs for $10? Well if you have a 5cmx5cm design it looks like you can at ITeadStudio. I have not used these guys and the lead time is a little long (up to 20 business days), but you can’t beat the price!
10 5cmx5cm 2 layer PCB – $9.90
10 5cmx10cm 2 layer PCB – $22.00
10 10cmx10cm 2 layer PCB – $24.90
There is also an option to get up to 5, 50cm X110cm boards for $38! Sounds too good to be true, anyone out there use these guys yet?
So the magic box contained a 3 axis CNC! Very very cool. Â I have made PCBs for years, and have come to two realizations, chemical etching sucks with unreliable results and professionally made PCBs can take lots of time and money, especially for single prototypes. Â I bought this CNC to make PCBs on demand and on the cheap. Â I also plan on cutting basic plastic and metal parts, but mostly PCBs.
I purchased the unit from Ebay from the seller “igoodmart2011” for about $900 USD. Â Here is a search for CNC 3040. Â The one I purchased included the blue control box however does not have the water cooled spindle
Here are some specs for the unit
“No name” “CNC 3040” from China
3 axis (X, Y, Z)
300 x 400mm area (275 x 385 x 55mm working area)
Motors:Â two-phase 57/1.8A steppers
Repeat positioning Accuracy:0.05mm
Manual spindle control:Â 1000~8000RPM/MIN
Parallel port interface
The unit was shipped from LA and arrived here in Colorado in about 4 days. Â The unit was mostly assembled in the box. Â The frame and was assembled, the table the material sits on was attached and all cables and cable trays were run and attached. Â The stepper motors were in a separate box and were attached without issue to the 3 axis shafts. Â The controller box also connected up quickly as all cables were marked. Â Attachment to the PC was done via an included parallel cable.
One thing to note, a DVD was included in the package, and when I tried to read it on a Windows machine it said it was blank.  If you plan on using the provided software on the CD make sure you can contact the seller to get a copy if the DVD doesn’t work.  I personally didn’t care because I am going to  control the machine via LinuxCNC, however a digital manual would have helped.
I’ll do another post explaining how to setup and control the machine.
Here is a little command line fu I worked today, it seemed post worthy.
I found a site I wanted to emulate so I checked out the CSS file only to see a “obfuscated” version, missing new lines and spaces. Â I whipped up this little sequence of sed commands to de-obfuscate the CSS.
List each line of the CSS file, add a new line after all }, { and ; characters. Â Add 2 spaces to all lines, then remove the spaces from lines that have a { at the end. Â This results in some pretty readable code.
 So I was searching around and didn’t find many pages talking about revision control of Eagle PCB files so I struck out on my own. I have a license for Eagle 5.X so this post covers binary files (Guess where the previous post came from), not Eagle 6 with the new XML based files.